Global Japanese Sushi Rolls
Highlighted under: International Cuisine Recipes
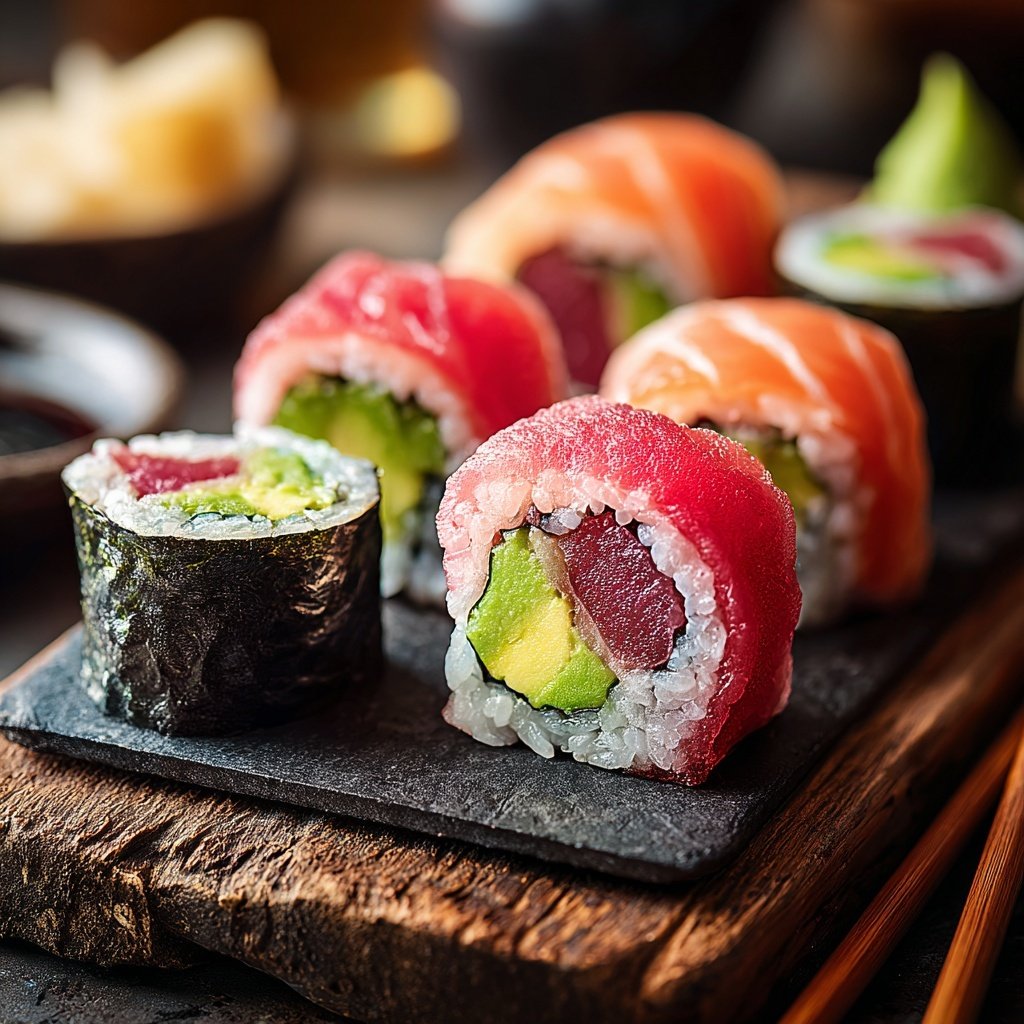
I absolutely love making sushi at home, and these Global Japanese Sushi Rolls are one of my favorite creations. They combine traditional Japanese ingredients with a world of flavors, making every bite an exciting culinary adventure. Each roll is beautifully crafted, showcasing bright colors and vibrant tastes that not only please the eye but also tantalize the taste buds. By experimenting with various fillings and toppings, I've found ways to elevate this classic dish, and I can't wait for you to experience it too!
When I first learned to make sushi, I was amazed at how versatile it could be. The Global Japanese Sushi Rolls allow me to blend different cuisines—like adding a touch of Mexican flavor with avocado or South Asian spices to the fillings. Each attempt not only improves my rolling technique but also boosts my creativity in the kitchen.
For those hesitant about trying sushi-making, I recommend starting with a simple cucumber and cream cheese filling before moving to more complex ingredients. This way, you can practice your rolling skills without getting overwhelmed. Trust me, it’s more fun than it seems!
Why You'll Love These Sushi Rolls
- A fusion of global flavors wrapped in comforting sushi rice
- Endless customization options for any palate
- Fresh ingredients that make each bite feel like a gourmet experience
Choosing Your Fillings
The versatility of these sushi rolls lies significantly in the fillings you choose. Traditional options such as avocado and cucumber provide a fresh crunch, while protein sources like shrimp or crab meat add richness. If you're looking to explore international flavors, consider adding ingredients like roasted red peppers for a Mediterranean flair or smoked salmon for a hint of umami. Just be mindful of balancing textures—a creamy filling pairs beautifully with crisp vegetables.
When selecting fillings, think about complementary flavors. For instance, the creamy texture of cream cheese offers a delightful contrast to the crispness of fresh vegetables. Additionally, feel free to replace ingredients depending on dietary needs; for example, tofu or edamame can stand in for seafood, providing a nutritious plant-based option without sacrificing the overall flavor profile.
Perfecting Your Rolling Technique
Mastering the rolling technique is essential for achieving beautifully shaped sushi rolls. Keeping your hands wet helps prevent the sushi rice from sticking. When you’re ready to roll, apply a firm yet gentle pressure as you guide the bamboo mat. Start from the edge closest to you, ensuring the fillings are tucked in snugly while rolling forward. Avoid rolling too tightly, as this can squeeze out the fillings, leaving you with an unbalanced roll.
After sealing your roll with a bit of water, take a moment to let it rest before slicing. This helps the nori to soften slightly and adhere better, which reduces the risk of your roll falling apart once cut. Use a sharp knife for slicing—it should glide through the roll without mashing it. Wipe the blade with a damp cloth between cuts to ensure clean edges.
Ingredients
Sushi Rice
- 2 cups sushi rice
- 2 1/2 cups water
- 1/2 cup rice vinegar
- 1/4 cup sugar
- 1 teaspoon salt
Fillings
- 1 ripe avocado, sliced
- 1 cucumber, julienned
- 1 carrot, julienned
- 1/2 pound cooked shrimp or crab meat
- 1/4 cup cream cheese
Extras
- 4 sheets of nori
- Soy sauce for dipping
- Wasabi and pickled ginger (optional)
Make sure to have a bamboo sushi mat on hand to help in rolling your sushi evenly.
Steps
Prepare the Sushi Rice
Rinse the sushi rice under cold water until the water runs clear. Combine the rinsed rice and water in a pot and let it soak for 30 minutes. Then, bring it to a boil, reduce the heat to low, cover, and cook for 20 minutes. Once cooked, let it cool slightly.
Season the Rice
In a small saucepan, combine rice vinegar, sugar, and salt. Heat gently until the sugar dissolves, then stir this mixture into the cooked rice, mixing gently to avoid mushiness.
Assemble the Rolls
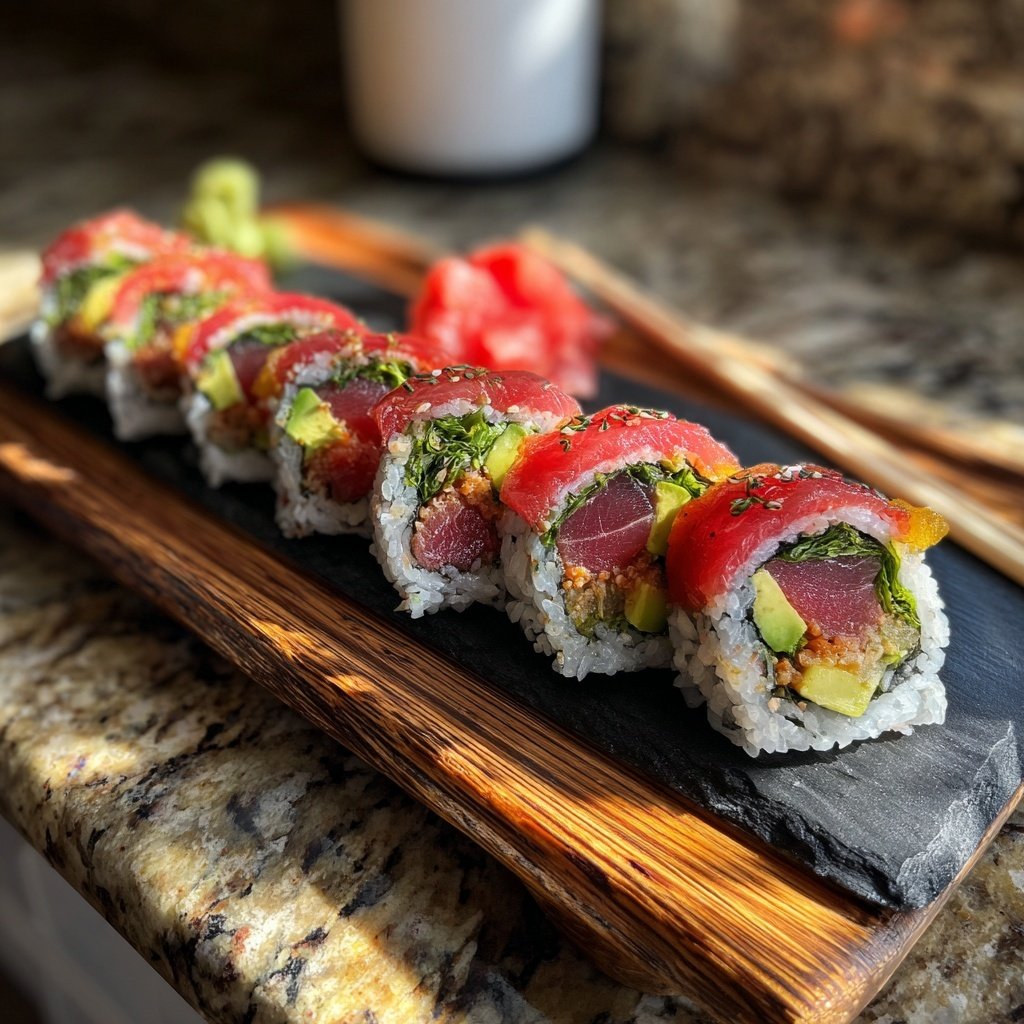
Place a sheet of nori on the bamboo mat, with the shiny side down. Wet your hands to prevent sticking and spread about 1 cup of sushi rice evenly over the nori, leaving a 1-inch border at the top. Arrange your chosen fillings in a line across the middle.
Roll the Sushi
Using the bamboo mat, lift the edge of the mat closest to you and begin to roll it away from you, tucking the fillings tightly. Continue to roll, applying gentle pressure to form a tight roll, then seal the edge of the nori with a bit of water.
Slice and Serve
Using a sharp knife, slice the roll into 6 to 8 pieces. Serve with soy sauce, wasabi, and pickled ginger for an authentic experience.
Feel free to experiment with different ingredients in your rolls—what matters most is having fun and enjoying the process!
Pro Tips
- For perfect rolls, make sure your sushi rice is sticky enough to hold together, and don't overfill your rolls to avoid spilling ingredients.
Storage and Make-Ahead Tips
If you plan to make sushi rolls ahead of time, it’s best to store them uncut and wrapped tightly in plastic wrap. Keep them in the refrigerator, and they should stay fresh for up to 24 hours. However, the texture of the nori may soften over time, so it's often best to enjoy them the same day they're made. Leftover fillings can also be stored in airtight containers in the refrigerator, making it easy to whip up new rolls on the following day.
For those leading busy lifestyles, prepare your sushi rice and fillings in advance. Cook your rice a day ahead and refrigerate it, and pre-cut your vegetables. This allows you to assemble fresh sushi rolls quickly whenever the craving strikes. Just remember to bring the rice back to room temperature before rolling, as cold rice can prevent it from sticking properly.
Variations to Explore
Don't hesitate to get creative with variations of these sushi rolls! Use flavored sushi rice by adding ingredients like sesame oil or furikake for additional flavor. Try introducing fruits like mango or strawberries; their sweetness beautifully balances the savory fillings. Another fun twist is to incorporate tempura fried vegetables, which add a delightful crunch and a layer of flavor.
For a sushi roll with a kick, consider using spicy mayonnaise made from mixing mayonnaise with sriracha; this gives the roll a creamy yet spicy edge. You can also top your sushi rolls with slices of fresh jalapeños or a sprinkle of chili flakes for added heat. These customizations allow you to tailor each sushi roll to your taste preferences and introduce exciting new flavors.
Questions About Recipes
→ Can I use regular rice instead of sushi rice?
It's best to use sushi rice due to its sticky texture, but in a pinch, you can use short-grain rice.
→ How do I make vegan sushi rolls?
Simply replace seafood and cream cheese with vegetables like bell peppers, tofu, or avocado.
→ What can I substitute for nori?
You can use lettuce leaves, or even thinly sliced cucumber, as a substitute for nori.
→ How long do sushi rolls last in the fridge?
Fresh sushi rolls are best eaten the same day, but they can be stored in the fridge for up to 24 hours. Just make sure to wrap them tightly to prevent them from drying out.
Global Japanese Sushi Rolls
Created by: The Chefethanfoods Team
Recipe Type: International Cuisine Recipes
Skill Level: Intermediate
Final Quantity: 4 rolls
What You'll Need
Sushi Rice
- 2 cups sushi rice
- 2 1/2 cups water
- 1/2 cup rice vinegar
- 1/4 cup sugar
- 1 teaspoon salt
Fillings
- 1 ripe avocado, sliced
- 1 cucumber, julienned
- 1 carrot, julienned
- 1/2 pound cooked shrimp or crab meat
- 1/4 cup cream cheese
Extras
- 4 sheets of nori
- Soy sauce for dipping
- Wasabi and pickled ginger (optional)
How-To Steps
Rinse the sushi rice under cold water until the water runs clear. Combine the rinsed rice and water in a pot and let it soak for 30 minutes. Then, bring it to a boil, reduce the heat to low, cover, and cook for 20 minutes. Once cooked, let it cool slightly.
In a small saucepan, combine rice vinegar, sugar, and salt. Heat gently until the sugar dissolves, then stir this mixture into the cooked rice, mixing gently to avoid mushiness.
Place a sheet of nori on the bamboo mat, with the shiny side down. Wet your hands to prevent sticking and spread about 1 cup of sushi rice evenly over the nori, leaving a 1-inch border at the top. Arrange your chosen fillings in a line across the middle.
Using the bamboo mat, lift the edge of the mat closest to you and begin to roll it away from you, tucking the fillings tightly. Continue to roll, applying gentle pressure to form a tight roll, then seal the edge of the nori with a bit of water.
Using a sharp knife, slice the roll into 6 to 8 pieces. Serve with soy sauce, wasabi, and pickled ginger for an authentic experience.
Extra Tips
- For perfect rolls, make sure your sushi rice is sticky enough to hold together, and don't overfill your rolls to avoid spilling ingredients.
Nutritional Breakdown (Per Serving)
- Calories: 450 kcal
- Total Fat: 14g
- Saturated Fat: 2g
- Cholesterol: 70mg
- Sodium: 600mg
- Total Carbohydrates: 62g
- Dietary Fiber: 4g
- Sugars: 5g
- Protein: 12g